Archives


10 Best Tile Cutters for Professional and DIY Use

Choosing the right Tile Cutter can change a difficult renovation into a controlled, accurate job. It can also expose weak planning quickly.

For professionals, the tool must handle repeated cuts, dense porcelain, and long-format pieces without losing precision. DIY users need something different. A lighter model, clear scoring action, and simple adjustments may matter more than maximum capacity. I have seen small mistakes begin with a loose guide or a dull scoring wheel. The finished edge then looks chipped, uneven, or visibly rushed.

Tile consultant Donato Pompo, a respected ceramic tile and stone industry expert, says, “A good tile installation starts with a good substrate.” His point applies to cutting too. Even the best Tile Cutter cannot rescue inaccurate measurements, unstable tiles, or poor surface preparation. This guide compares ten strong options for professional and home use. Each model is considered for cutting accuracy, build quality, portability, handle comfort, and performance on ceramic and porcelain tile.

Some cutters excel on bathroom backsplashes. Others suit large floors or demanding commercial work. Water-cooled electric models can reduce chipping, but they require more setup and cleanup. Manual cutters are quieter and faster for many straight cuts. Neither choice is perfect.

A few recommendations may feel surprising. Price does not guarantee control. A compact cutter may outperform a heavier model on smaller projects. Read the details carefully, then match the tool to your tile, workspace, and actual skill level.
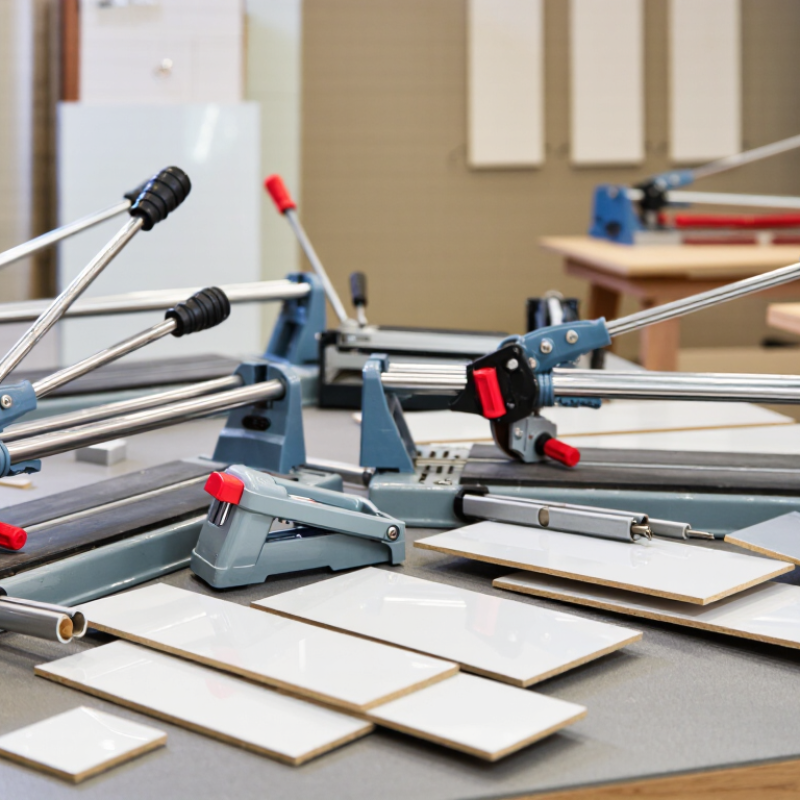
10 Best Tile Cutters for Professional and DIY Use

Types of Tile Cutters and How They Work

Tile Cutters for Professional and DIY Use

A manual tile cutter uses a hardened scoring wheel to mark the glazed surface. Pressure then snaps the tile along that line. It works quickly on straight cuts, especially with ceramic and many porcelain tiles. The cutting bed should remain clean and stable. Tiny grit can shift the tile and spoil an otherwise accurate cut.

A wet saw uses a diamond blade and a continuous water supply. Water cools the blade and reduces airborne dust during harder cuts. It handles thick porcelain, stone, and repeated cuts better than most manual tools. The operator guides the tile slowly, without forcing it. I once pushed too quickly and chipped a visible corner. That mistake taught me to value control over speed.

Tile nippers remove small pieces from edges and help shape irregular openings. They are useful around pipes, but they can leave rough, uneven bites. A diamond hole saw creates circular openings for plumbing fixtures. For curves, some installers use a compact grinder with a diamond blade, while wearing suitable eye, hearing, and respiratory protection.

Measure twice. Cut once.

Yet measurements still deserve checking against the actual wall, because rooms are rarely perfectly square. A professional result often depends less on the cutter itself and more on blade condition, firm support, and patient handling.

Key Features to Compare Before Choosing a Tile Cutter

Choosing a tile cutter starts with the tile, not the tool. Measure tile length, thickness, and material before comparing models. A manual cutter suits straight cuts in common ceramic and some porcelain tiles. For thick porcelain, an electric wet cutter may deliver cleaner edges. Do not trust capacity figures alone. I once ignored bed width and struggled with a large-format tile. That small mistake created pressure marks and wasted time.

Compare the scoring wheel, breaker strength, and rail rigidity. A sharp wheel should score smoothly without repeated passes. Repeated scoring often leaves jagged edges. Check whether the guide stays square during firm pressure. A stable base matters when tiles are heavy or glossy. Look for clear measurements, adjustable stops, and a comfortable handle. For wet cutting, inspect water flow, splash control, and blade visibility. These details affect accuracy more than appearance.

Safety and maintenance deserve equal attention. Eye protection, controlled hand pressure, and a clean work area reduce avoidable errors. For electric models, review ground-fault protection, cord placement, and cutting depth. A removable tray makes slurry cleanup less unpleasant. Test the cutter on a spare tile first. Listen for rail play and watch the break line. My preference is a tool that feels predictable, even if it cuts slightly slower. Fast is not always better.

The 10 Best Tile Cutters for Professional and DIY Projects

The 10 Best Tile Cutters for Professional and DIY Projects

Choosing among the 10 best tile cutters depends on tile thickness, material, room size, and cutting accuracy. A compact manual snap cutter suits small ceramic tiles and occasional repairs. A heavy-duty rail cutter handles porcelain with steadier pressure. A scoring-wheel cutter offers clean, controlled lines when the wheel matches the tile surface. A lever cutter adds useful force for thicker pieces. These tools create little dust and work well in occupied homes.

For dense porcelain, a wet table saw usually delivers straighter cuts and smoother edges. A bridge saw provides greater stability for large-format tiles, although it needs considerable workspace. An angle grinder with a diamond blade manages curves and difficult notches, but its dust demands careful control. A tile nipper helps shape small corners. A diamond hole saw creates openings for pipes, while a handheld wet cutter offers portability on smaller jobs. Each tool has a place.

I once selected a manual cutter for a very hard porcelain tile. The score looked perfect, but the break wandered near the end. That mistake taught me to test spare pieces first. Check the cutter’s capacity, replace worn scoring wheels, and measure twice before cutting. Wear eye protection, keep electrical tools away from standing water, and follow the equipment instructions. Even experienced installers can rush a final cut. That is where expensive errors often begin.

10 Best Tile Cutters for Professional and DIY Projects

This comparison uses typical maximum straight-cut capacities for widely available manual and electric tile-cutter formats. Larger capacities suit professional flooring work, while compact cutters are practical for DIY repairs and small rooms.

How to read the chart: A higher cutting capacity allows the tool to handle larger-format tiles. Always match the cutter’s rated capacity with the tile’s actual size, thickness, and material.

How to Match a Tile Cutter to Different Materials and Jobs

Choosing among the 10 best tile cutters depends on the tile, the cut, and the working conditions. A manual score-and-snap cutter suits standard ceramic wall tiles and repeated straight cuts. It is fast, quiet, and easy to carry. However, dense porcelain often needs a stronger rail, a sharper scoring wheel, and steady pressure.

Glass tile requires more care. Use a cutter designed for delicate surfaces, then smooth the edge with a diamond rubbing stone. For thick porcelain, quarry tile, or natural stone, a water-cooled saw usually gives cleaner results. Its blade reduces heat and dust, but the setup needs electricity, water control, and a stable table. Small jobs may not justify that effort.

Curved cuts need a different approach. Tile nippers can remove small sections, while an angle grinder with a suitable diamond blade can shape larger curves. Wear eye, hearing, and respiratory protection.

Measure twice. Cut once. Still, measurements can fail when walls are uneven. I recommend making a cardboard template before cutting expensive stone. Leave room for grout and movement joints, especially near floors and wet areas. A beginner may choose the most powerful cutter, but control matters more than strength. Test on a spare tile first. That small test often exposes a weak scoring line, a chipped edge, or the wrong blade.

Safe and Accurate Techniques for Using a Tile Cutter

Choosing among the 10 best tile cutters matters less than using one safely and accurately.

Before cutting, inspect the frame, scoring wheel, guide, and base for damage. Wear safety glasses, closed shoes, and cut-resistant gloves. Keep loose clothing away from moving parts. For powered cutters, use water control and adequate ventilation to reduce airborne dust.

Measure the tile twice, then mark the finished side with a fine pencil. Place the tile firmly against the guide, with the mark aligned to the scoring path. Apply steady, moderate pressure during one scoring pass. Pressing too hard can chip the glaze or damage the wheel. Slow is safer. After scoring, use controlled pressure to separate the tile along the line.

I have found that rushing usually creates crooked edges, especially near corners and narrow strips. A small practice cut on spare tile can reveal how much pressure the tool needs. It is an easy step to skip.

For irregular shapes, make several shallow cuts rather than forcing one deep cut. Smooth sharp edges with a suitable abrasive stone, keeping fingers clear of the freshly cut surface.

Clean fragments promptly, and unplug powered equipment before adjustments or blade changes. Even experienced users should pause when the tile shifts, the cut line disappears, or the tool feels unusually resistant. That hesitation may prevent a broken tile or an avoidable injury.

Close
Enter your email address to receive special offers!
linkedin facebook pinterest youtube rss twitter instagram facebook-blank rss-blank linkedin-blank pinterest youtube twitter instagram